
How to make wooden signs with a router? The router is one of the most important and versatile tools for woodworking. You are able to do any woodworking task with the help of this tool. Do you have any knowledge of wood-crafting? As crafting your own wood signs is not only a task that only professionals can do. What is the thing you need to do this task? No more you need just a router to really work for this task.
What We Have Covered
How to Use a Wood Router to Make Amazing Wooden Signs
As with the help of a versatile router, a piece of wood and a few common tools, you can craft wood signs for your relatives, friends or yourself. If you work as a professional in this, then, you can sell them at crafts shows.
Why are we using routers to do this task? Using a router to make wooden signs look more polished and professional. The whole process is very simple and it will allow you to make one kind of very unique design for your property.
Thing You Need
Here are a few things you need to design wooden signs with a router.
- Router
- Pencil
- V-groove router bit
- Safety glasses
- Design template or letter
- Grip Pad
- Carbon paper
How to Make Wooden Signs with a Router
Here, I am presenting you a step-by-step guide on how to make wooden signs with a router. You will also know about wood carving as well. This guide will provide you with a very simple way to do this task.
Decision Making
What is the first thing you need to look at while making a wooden sign with a router? The first thing you need to look at is to decide what you are making? This is the important step to decide the size of the sign, as well as the size of the letter. But most of the time you cannot have it both ways.
What is the most important? If the size of the letter is most important for you, then, it is important to determine the signboard dimension by the number of words. And if you think that the signboard dimension is important in your case, then the letter needs to be adjusted in the required size.
You May Also Like How to Use a Router Table
Pick Out Bigger Size
After deciding the size of the letter, now, it’s your duty to pick out the board that is bigger than the size. You have to decide whether you can finish your work with the same size or large size. Using the exact size of the board will provide a little bit of difficulty in this task, depending upon the size and number of words.
How to prepare this board? You are able to prepare your board by sanding, trimming and planning rough ends of the wood. This really needed a part in the equation on how to make wooden signs with a router.
Draw the Sign

What is the usage of the pencil during this task?
After the second step, now it is time to draw the sign with the hand or by stencil or with the usage of the computer-assisted printout.
Country-style or home-made signs look very elegant because they are drawn freehand.
Business or regulatory signs, as well as more traditional or formal signs, look like very good stencil. It is best for more words, fancy fonts, pictures, and better layout with the usage of the computer. How to use these images or words? Lettering can be done boldly with the pencil or spray glued directly to the board as well.
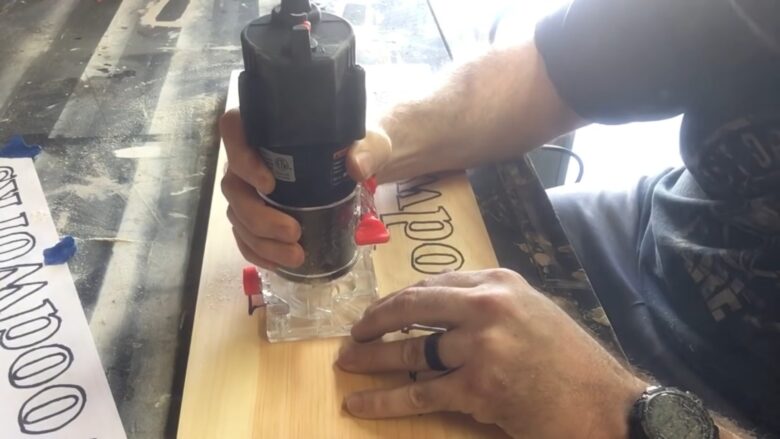
Easiest Part in the Routing
Now place the board on the sturdy workbench. You can clamp it down or you can lay it on a piece of foam rubber carpet. You have to do it so that it will not slide around.
Now, pick out a router bit, either V groove, round nose, or square end. All router bits used for sign making are described properly. If you want to know about these router bits and their working then check the complete guide on the article What router bit to use for sign making?
These router bits are easier to plunge as well as cut with. Cutting too deep with cause difficulty guiding it and the wood will burn or smoke. These bits will show such behavior if the bit is too dull. So for this, just buy a good carbide bit and also test these on a scrap piece.
As the plunge router is able to do this task in less effort as compared to a fixed one. For this, grab the router with both hands and look at your forearms and touch the work table.
Now, make the cut with the help of your wrists to guide the motion of the power. It is recommended that you do not touch the router down without having your arms holding the position on the table as well. The reason is that an out of control router is always dangerous for the user as well. So, you have to follow safety procedures before this.
Finish the Sign
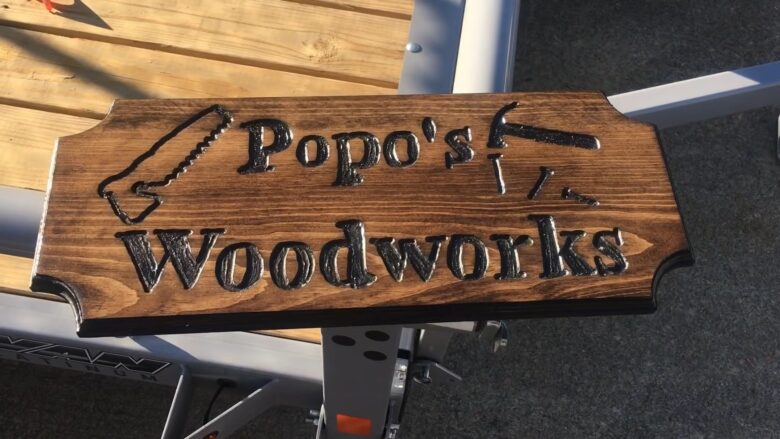
After this, now finish the sign you like. What do I know? Paint the letters and plane off or sand the excess after it dries. As for painting, the background is somewhat time-consuming as well as tricky as well. So, what is the better choice? Is just better for you to put the clear finish and let the whole wood show its beauty.
Now, you are also able to oil it regularly and polyurethane or varnish occasionally. If you do nothing, then, let it be natural as well as turn gray. You are able to create many designs with the help of your imaginations.
Crafts Shows
Which one is the better venue to craft? As the crafts shows are the excellent or good venue for this whole craft. If you want to invest in the required equipment, then, covered trailer, wood router, paints and paint sprayer, generator, dust collector, license, permit, workbench, vendor tent as well as fees for the show you might make a lot of money in the weekend with ease. For this, you need a permanent source of free wood, good weather, good assistant as and also the excellent crowd.
An Ideal Gift
As your wooden is complete. It is seen that people love their funny signs. As there is no doubt that router signs make an ideal gift for your friends, relatives, home, camper, office, shop, and boats as well. You can craft addresses, names, awards as well as saying with the help of routers.
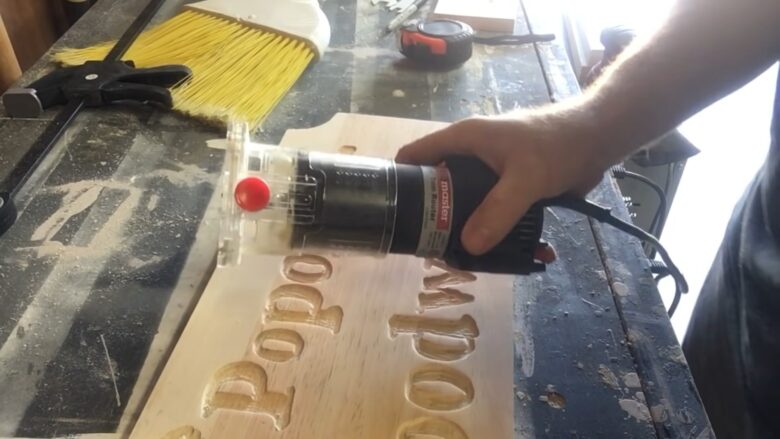
On the other hand, you can also craft any image or anything you want. It totally depends upon your needs and professional skills. It is always recommended to use the router in forward motion, never backward. Also push the router very slowly and also trace the lines with the help of bits.
Warnings and Tips
Before this task, you must know about a few warnings and tips to answer the question, how to make wooden signs with a router. Here are a few tips and warnings about this case.
Before starting, practice the router on scrap wood. You have to do this to check the flow of the router as well as the bit before starting working on the wooden sign. It is recommended that try different tips when you are professional in this regard. With the help of these special tips, you can make different types of patterns and letters.
Always try to wear safety glasses when working with the wood and router.
Try to turn the router on before you will make contact with the wood. It is recommended that do not set the bit on the wood and then start your router after this.
Final Verdict
It is always fun to make a wooden sign with the help of a router. You can make signs, pictures, names, addresses, and much other design to increase the beauty of the product. If you wish to create a luxurious design, then, we recommend you to read our guide on how to make wooden signs with a router. We have tried to provide you with an easy and elegant guise to do this task with much ease.
Here, we have all from the subject of how to make wooden signs with a router. We hope that this guide will help you in the best regard to understanding how to make these designs. If you have any query regarding this subject, then, you can put on us in the comments below.
Check out some other routers from Amazon also: